利用CF的Pages创建BPB面板
利用BPB Panel 部署Cloudflare Workers 或 Pages 的代理面板项目,可以轻松建立免费 VPN,因CF对代理项目审查较严格,所以需要需要对源码进行自定义加密混淆,生成不同的混淆代码,绕过CF的限制。
方法一
准备工作
Github帐号;cloudflare账号;域名(收费或免费域名)
Github部署
新建github仓库:把BPB panel项目代码同步到仓库。
配置github Actions: 在仓库目录下创建.github/workflows文件夹,并创建Obfuscate.yml文件。
1 | name: Build Obfuscate BPB worker # 工作流名称:构建并混淆BPB worker |
Github仓库通过Obfuscate.yml自动下载BPB源代码,并执行混淆。
假如失效,可以进入BPB panel大佬项目地址重新更新download地址
Cloudflare 部署
•创建pages:点击workers和pages,选择pages部署。连接github仓库,选择新建的项目仓库,然后点击部署。
•绑定自定义域名:以防止page分配的域名被屏蔽。
•设置变量:
UUID:使用UUID在线生成器
PROXY_IP:从随机代理ip站点获取
TR_PASS:随便写个密码
•绑定KV命名空间:名称随便但不能含有bpb等敏感词,绑定的是小写kv
•重试部署pages
BPB面板设置
•部署成功后,打开浏览器输入:https://[自定义域名]或者你的项目地址,后面加上/panel检查是否能正常访问BPB面板.
•修改BPB面板密码
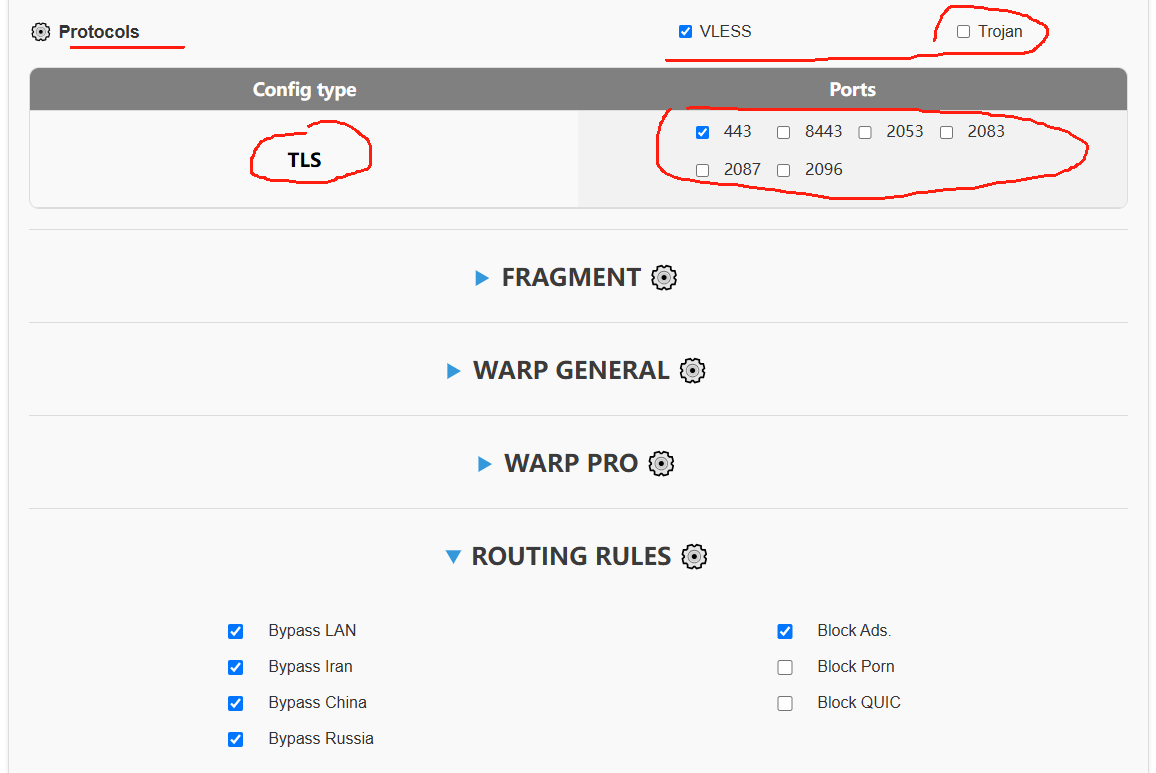
•配置BPB面板参数
常用IP获取方式
cleanIP/优选IP:地址1 地址2 地址3 优选域名
PROXYIP:点击进入1 点击进入2
优选域名
本地优选ip windows版,下载地址
节点测试
在V2rayN上使用演示
Proxy IPs / Domains 获取地址:这里
方法二
(也是自己在用,自带混淆以后也可套用这个)
在根目录创建项目,然后添加.github/workflows/Obfuscate.yml文件,输入以下代码
2
3
4
5
6
7
8
9
10
11
12
13
14
15
16
17
18
19
20
21
22
23
24
25
26
27
28
29
30
31
32
33
34
35
36
37
38
39
40
41
42
43
44
45
46
47
48
49
50
51
52
53
54
55
56
57
58
59
60
on:
push:
branches:
- main
schedule:
- cron: "0 3 * * *" # 每天凌晨3点自动运行
workflow_dispatch: # 支持手动运行
permissions:
contents: write
jobs:
build:
runs-on: ubuntu-latest
steps:
- name: Check out the code
uses: actions/checkout@v4
- name: Set up Node.js
uses: actions/setup-node@v4
with:
node-version: "latest"
- name: Install dependencies
run: |
npm install -g javascript-obfuscator
sudo apt-get install -y unzip
- name: Download and extract latest my_tro worker
run: |
wget https://raw.githubusercontent.com/camel52zhang/my_tro/refs/heads/main/_worker.js
mv _worker.js origin.js
- name: Clean existing obfuscated files # 新增清理步骤
run: |
rm -f _worker.js*
- name: Obfuscate my_tro worker js
run: |
javascript-obfuscator origin.js --output _worker.js \
--compact true \
--identifier-names-generator hexadecimal \
--rename-globals true \
--string-array true \
--string-array-encoding 'base64' \
--string-array-threshold 0.75 \
--transform-object-keys true \
--self-defending false \
--simplify true
- name: 提交更改
uses: stefanzweifel/git-auto-commit-action@v5
with:
branch: main
commit_message: ':arrow_up: update latest my_tro'
commit_author: 'github-actions[bot] <github-actions[bot]@users.noreply.github.com>'
push_options: '--set-upstream'
方法三
在根目录创建项目,然后添加.github/workflows/update-worker.yml文件,输入以下代码1
2
3
4
5
6
7
8
9
10
11
12
13
14
15
16
17
18
19
20
21
22
23
24
25
26
27
28
29
30
31
32
33
34
35
36
37
38
39
40
41
42
43
44
45
46
47
48
49
50
51
52
53
54
55
56
57
58
59
60
61
62
63
64
65
66
67
68
69
70
71
72
73
74
75
76
77
78
79
80
81
82
83
84
85name: Auto Update Worker
on:
push:
branches:
- main
schedule:
- cron: '3 1,13 * * *' # 每天 UTC 时间 1:03 和 13:03 自动运行(北京时间 9:03 和 21:03)
workflow_dispatch: # 支持手动运行
permissions:
contents: write
jobs:
update:
runs-on: ubuntu-latest
steps:
- name: 初始化仓库
uses: actions/checkout@v4
- name: 获取当前本地版本
id: get_local_version
run: |
echo -e "\033[34m[获取本地版本]\033[0m"
if [ -f version.txt ]; then
LOCAL_VERSION=$(cat version.txt)
echo "当前本地版本: $LOCAL_VERSION"
else
echo "首次同步,没有本地版本。"
LOCAL_VERSION=""
fi
echo "LOCAL_VERSION=$LOCAL_VERSION" >> $GITHUB_ENV
- name: 获取最新 Release 信息
id: get_release
run: |
echo -e "\033[34m[获取最新 Release]\033[0m"
API_URL="https://api.github.com/repos/bia-pain-bache/BPB-Worker-Panel/releases"
RESPONSE=$(curl -s "$API_URL")
LATEST_RELEASE=$(echo "$RESPONSE" | jq -r '.[0]')
TAG_NAME=$(echo "$LATEST_RELEASE" | jq -r '.tag_name')
DOWNLOAD_URL=$(echo "$LATEST_RELEASE" | jq -r '.assets[] | select(.name == "worker.zip") | .browser_download_url')
if [ -z "$DOWNLOAD_URL" ] || [ "$DOWNLOAD_URL" == "null" ]; then
echo -e "\033[31m未找到 worker.zip,退出!\033[0m"
exit 1
fi
echo "最新版本号: $TAG_NAME"
echo "DOWNLOAD_URL=$DOWNLOAD_URL" >> $GITHUB_ENV
echo "TAG_NAME=$TAG_NAME" >> $GITHUB_ENV
- name: 判断是否需要更新
id: check_update
run: |
echo -e "\033[34m[判断是否需要更新]\033[0m"
if [ "$LOCAL_VERSION" = "$TAG_NAME" ]; then
echo -e "\033[32m已经是最新版本,无需更新。\033[0m"
echo "UPDATE_NEEDED=false" >> $GITHUB_ENV
else
echo -e "\033[33m发现新版本,需要更新!\033[0m"
echo "UPDATE_NEEDED=true" >> $GITHUB_ENV
fi
- name: 如果需要,清理旧文件并下载新版本
if: env.UPDATE_NEEDED == 'true'
run: |
echo -e "\033[34m[清理旧文件]\033[0m"
rm -rf ./*
echo -e "\033[34m[下载最新 worker.zip]\033[0m"
wget -O worker.zip "$DOWNLOAD_URL"
echo -e "\033[34m[解压 worker.zip]\033[0m"
unzip worker.zip
echo -e "\033[34m[删除 worker.zip]\033[0m"
rm worker.zip
echo -e "\033[34m[记录新版本号]\033[0m"
echo "$TAG_NAME" > version.txt
- name: 提交更改
if: env.UPDATE_NEEDED == 'true'
uses: stefanzweifel/git-auto-commit-action@v5
with:
commit_message: "🔄 自动同步最新 Worker 版本:${{ env.TAG_NAME }}"
commit_author: "github-actions[bot] <github-actions[bot]@users.noreply.github.com>"
push_options: --force
方法四:
这种方式适用那些只是抓取文件,利润_worker.js,然后去混淆的项目
同样的在根目录创建项目,然后添加.github/workflows/Obfuscate.yml文件,输入以下代码
2
3
4
5
6
7
8
9
10
11
12
13
14
15
16
17
18
19
20
21
22
23
24
25
26
27
28
29
30
31
32
33
34
35
36
37
38
39
40
41
42
43
44
45
46
47
48
49
50
51
52
53
54
55
56
57
58
59
60
61
62
63
64
65
66
67
68
69
70
71
72
73
74
75
76
77
78
79
on:
push:
branches:
- main # 主分支推送时触发
schedule:
- cron: "0 3 * * *" # 每天凌晨3点自动运行
workflow_dispatch: # 支持在GitHub网页手动触发工作流
permissions:
contents: write # 授予工作流写入仓库的权限
jobs:
build:
runs-on: ubuntu-latest # 使用最新版Ubuntu系统
steps:
# 步骤1:检出仓库代码
- name: Check out the code
uses: actions/checkout@v4
# 步骤2:设置Node.js环境
- name: Set up Node.js
uses: actions/setup-node@v4
with:
node-version: "latest"
# 步骤3:安装所需依赖
- name: Install dependencies
run: |
npm install -g javascript-obfuscator
sudo apt-get install -y unzip
# 步骤4:清理旧文件
- name: Clean existing obfuscated files
run: |
rm -f _worker.js* origin.js
# 步骤5:下载最新worker脚本_worker.js重命名为origin.js
- name: Download latest cmliu_edge worker
run: |
wget https://raw.githubusercontent.com/cmliu/edgetunnel/refs/heads/main/_worker.js -O origin.js
# 步骤6:执行JavaScript混淆
- name: Obfuscate JavaScript
run: |
javascript-obfuscator origin.js --output _worker.js \
--compact true \
--identifier-names-generator hexadecimal \
--rename-globals true \
--string-array true \
--string-array-encoding 'base64' \
--string-array-threshold 0.75 \
--transform-object-keys true \
--self-defending false \
--simplify true
# 步骤7:检查文件变更
- name: Check file changes
id: changes
run: |
if git diff --quiet --exit-code _worker.js; then
echo "has_changes=false" >> $GITHUB_OUTPUT
else
echo "has_changes=true" >> $GITHUB_OUTPUT
echo "Changes detected in _worker.js"
fi
# 步骤8:条件提交变更
- name: Commit and push changes
if: ${{ steps.changes.outputs.has_changes == 'true' }}
uses: stefanzweifel/git-auto-commit-action@v5
with:
branch: main
commit_message: ':arrow_up: update latest cmliu_edge'
commit_author: 'github-actions[bot] <github-actions[bot]@users.noreply.github.com>'
file_pattern: _worker.js